With protocol udp it sends packets to the IP address with different hop count. The first hop is typically port 33434, the second hop is 33435 etc. When traceroute gets the response back, it knows how far the packet got before the hop count went to zero.
To support traceroute, you need to allow IP traffic with ports in the range 33434… the upper limit which is normally less than 33434 + 100.
You can configure multiple ports in TCPIP, for example one for TLS, and one for non TLS.
You need to have rules for both inbound and outbound traffic specifying the x3270 port.
Internet Group Management Protocol (IGMP)
The Internet Group Management Protocol (IGMP) is a protocol that allows several devices to share one IP address so they can all receive the same data. IGMP is a network layer protocol used to set up multicasting on networks that use the IPv4. Specifically, IGMP allows devices to join a multicasting group.
I had an interface name ETH2 type (IntfType): IPAQENET with IpAddr: 192.168.1.74/0.
I had log records like
source IP Address 192.168.1.254 destination IP address 224.0.0.1 proto=igmp
OMPROUTE
This supports OSPF
When I started OMRPOUTE on z/OS I had a log record with
source IP address 10.1.1.2 destination IP addr= 224.0.0.5 proto= ospf(89) type= 1 outbound
OMPROUTE also gave a message (every 10 seconds)
EZZ8052I OMPROUTE SEND TO 224.0.0.5 BLOCKED BY TCPIP WHEN USING ETH1
When I started frr on a Linux machine I got a log entry
Source IP address 10.1.1.1 Destination IP address = 224.0.0.5 proto= ospf(89) type= 1 Interface= 10.1.1.2 Inbound
Which shows it came in over the z/OS interface 10.1.1.2 attached to my Linux machine
To see all my blog posts on IP filtering see here.
With IP filtering you defined rules to allow or deny to flow in or out of TCP/IP . These rules are defined using the Policy Agent, and you can display information about the rules using the UNIX ipsec command IP filter -f option.
If you refresh the policy agent, then the data may be reset – and any statistics lost. You should consider extracting the data, periodically, (such as half hourly), processing it and saving the results for later analysis. Plotting which rules were matched by day, and by time of day may give you insight as to the traffic and provide a base line for when you are investigating incidents.
SMF
SMF 119 subtype 2 records gives information for each connection . I do not know if there is a formatter for the SMF 119 records.
Extracting useful information from the ipsec command
I used the ISPF edit macro na to remove the not applicable stuff, and wrote a macro nafm to hide all the records which have no match.
/* REXX */
ADDRESS ISPEXEC
'ISREDIT MACRO'
trace o
"ISREDIT locate .ZFIRST          "
do I = 1 by 1
  "ISREDIT find  'FilterMatches:'"
  if rc <> 0 then leave
   "ISREDIT       (data)= LINE    .ZCSR "
   parse var data p1 p2  .
   if p2 <> 0 then iterate
   /* value is zero so go back and exclude the block */
  "ISREDIT find  'FilterName:' prev"
   "ISREDIT         (f1    ) = LINENUM .ZCSR "
  "ISREDIT find  '***********'     "
   "ISREDIT         (f2    ) = LINENUM .ZCSR "
   do j = f1 to f2 /* suppress the rows  */
     /* exclude the row  */
     "ISREDIT   XSTATUS " j "= X "
    end
 end
 "ISREDIT locate .ZFIRST          "
You can now issue commands like “delete all x” to delete the records which had no hits, or “delete all nx” to delete the records which had hits, leaving the unused records.
You can have full disk encryption. This prevents the disk from being read if it is removed from the environment. The disk subsystem requests the keys from a key manager, not z/OS, as the disk subsystem is doing the encryption and decryption. The keys are requested at power on of the disk subsystem.
On z/OS you can have data set encryption. The data set contents are encrypted on disk. Each data set could have a unique encryption key. Users on the system need permission to read the data set, and need access to the encrypt key.
If a userid is permitted to the data set, and to the encryption key, the userid has access to the data and can read and write it, the same was as if the data set was not encrypted.
Once you have set up the definitions, they are used when the data set is created. To encrypt a data set, you can…
Create a new (encrypted) dataset
Copy the old to the new.
Delete the old, and rename the new to old.
If you delete the key, then the data is not accessible unless you have a backup of the key – or you have a copy of the key on another system.
This encryption does not apply to files in Unix System Services, because these are not RACF protected.
MQ 9.2 and later supports encryption, including for page sets and log data sets. See here. DB2 can use data set encryption for its page sets and logs, see here.
You create an encryption key using the ICSF component on z/OS.
ISPF interface
If you are using the ICSF ISPF interface use options use : 5 Utility, 5 CKDS Keys, 7 Generate AES DATA keys. In the field Enter the CKDS record label for the new AES DATA key enter a memorable name. In the Red book, it uses a prefix of DATASET.name , I used COLINAES.
In AES key bit length: select 256 – other values give errors.
Batch interface
Use the operator command d icsf,kds to display the current datasets being used by ICSF. It gave me CSF.CSFCKDS.NEW .
The JCL below deletes the key, and creates a new key. It then refreshes the in memory data. (Once you delete the key, any data sets which used it cannot be read).
//IBMICSF  JOB 1,MSGCLASS=H
//STEP10 EXEC PGM=CSFKGUP
//  SET CKDS=CSF.CSFCKDS.NEW
//CSFCKDS DD DISP=OLD,DSN=&CKDS
//* LENGTH(32) GENERATES A 256 BIT KEY
//CSFIN DD *,LRECL=80
DELETE TYPE(DATA) LABEL(COLINBATCHAES )
ADD TYPE(DATA) ALGORITHM(AES),
LABEL(COLINBATCHAES          ) LENGTH(32)
/*
//CSFDIAG DD SYSOUT=*,LRECL=133
//CSFKEYS DD SYSOUT=*,LRECL=1044
//CSFSTMNT DD SYSOUT=*,LRECL=80
//* Refresh the in memory data
//REFRESH  EXEC PGM=CSFEUTIL,PARM='&CKDS,REFRESH'
This gave
CSFG0321 STATEMENT SUCCESSFULLY PROCESSED. CSFG0780 A REFRESH OF THE IN-STORAGE CKDS IS NECESSARY TO ACTIVATE CHANGES MADE BY KGUP.
The encryption information is used when the data set is created. This can be specified in JCL, VSAM DEFINE, or in the DFP extension of a dataset RACF profile.
Create and use the encryption key profiles
Use batch TSO. The statements below:
Uses SET to define the variable, as it is used in several places
Delete the old profile (there is no define replace)
Create the profile
Give userid IBMUSER read access to the profile
Refreshes the RACLIST information
Alters the data sets profile to set the DFP segment to use the key just defined
This encryption information is only used when a data is created.
If you use LISTCAT, it will show old information, until the data set is recreated.
More set up
When I tried creating a data set with the encryption label I got
IEF344I IBMRACF2 S3 DD2 - ALLOCATION FAILED DUE TO DATA FACILITY SYSTEM ERROR
IGD17157I DSNTYPE BASIC IS NOT A SUPPORTED DATA SET TYPE FOR ENCRYPTION
BECAUSE STGADMIN.SMS.ALLOW.DATASET.SEQ.ENCRYPT IS NOT DEFINED
IGD17151I ALLOCATION FAILED FOR DATA SET
COLIN.ENCR.DSN BECAUSE A KEY LABEL IS
SPECIFIED FOR AN UNSUPPORTED DATA SET TYPE.
IGD17150I DATA SET COLIN.ENCR.DSN IS ELIGIBLE FOR ACCESS METHOD ENCRYPTION. KEY LABEL IS (COLINBATCHAES)
LISTCAT output gave
LISTCAT ENTRIES('COLIN.ENCR.DSN') ALL
NONVSAM ------- COLIN.ENCR.DSN
     IN-CAT --- A4USR1.ICFCAT
     HISTORY
       ...
     SMSDATA
      ...
     ENCRYPTIONDATA
       DATA SET ENCRYPTION----(YES)
       DATA SET KEY LABEL-----COLINBATCHAES
Doing interesting things with encrypted data sets
You can use DFDSS to copy the encrypted dataset, without decrypting it. Any encryption parameters are copied to the new data set.
You need access to the CSFKEYS profile.
The JCL below
Deletes the old data set
Copies from COLIN.ENCR.DSN creating the output renaming COLIN to ADCD
I’ve done a lot of work using TLS, and Wireshark is a great tool for displaying the flows of data. The problem is understanding what the output shows! This blog post shows what to look at.
TCP/IP supports devices for IP V4 using statements like
DEVICE PORTA MPCIPA
  LINK ETH1 IPAQENET PORTA
...
HOME ...
     10.1.1.2 ETH1
...

BEGINRoutes
...
ROUTE DEFAULT      10.1.1.1 ETH1 MTU 1492
ENDRoutes


START PORTA
z/OS TCP has said these DEVICE and LINK statements should be converted these to use the INTERFACE statement, because the LINK and DEVICE statements will be withdrawn in a future release.
The interface statement basically merges the DEVICE, LINK and the relevant part of HOME into one INTERFACE statement. You can use Interface statements for IP V4 and IP V6. They are easier to configure and activate than DEVICE and LINK statements
The equivalent interface statement is
INTERFACE ETH1
    DEFINE IPAQENET
    CHPIDTYPE OSD
    IPADDR 10.1.1.2
    PORTNAME PORTA
The command can be written on one (or more lines). You can have
   INTERFACE JFPORTCP4
DEFINE IPAQENET
; this is a comment
CHPIDTYPE OSD IPADDR 10.1.1.2 PORTNAME PORTA
( Personally I would not; I prefer the command to start in column 1, and following lines indented).
If you name the interface the same as the LINK statement, you will not need to change any routing statements.
The easiest way of implementing the change is to make the change and restart TCP/IP.
The changes you need to make are
Replace the DEVICE and LINK statements with the INTERFACE statement
Remove the IP address from the HOME
Change the START from the port to the interface name
IntfName: ETH1              IntfType: IPAQENET   IntfStatus: Ready
    PortName: PORTA     Datapath: 0402     DatapathStatus: Ready
    CHPIDType: OSD            SMCR: Yes
    PNetID: *None*            SMCD: Yes
    TRLE: OSATRL1E
    Speed: 0000001000
    IpBroadcastCapability: No
    CfgRouter: Non                   ActRouter: Non
    ArpOffload: Yes                  ArpOffloadInfo: Yes
    CfgMtu: None                     ActMtu: 8992
    IpAddr: 10.1.1.2/0
    VLANid: None                     VLANpriority: Disabled
    ReadStorage: GLOBAL (4096K)
    InbPerf: Balanced
    ChecksumOffload: Unsupported     SegmentationOffload: No
    SecClass: 255                    MonSysplex: No
    Isolate: No                      OptLatencyMode: No
  Multicast Specific:
    Multicast Capability: Yes
    Group             RefCnt        SrcFltMd
    -----             ------        --------
    224.0.0.1         0000000001    Exclude
      SrcAddr: None
  Interface Statistics:
...

IPv4 LAN Group Summary
LanGroup: 00001
  Name              Status      ArpOwner          VipaOwner
  ----              ------      --------          ---------
  ETH1              Active      ETH1              Yes
where interesting fields are
IntfName: ETH1 the interface name
IntfType: IPAQENET the interface type
IntfStatus: Ready the status of the interface
PortName: PORTA the port name
Datapath: 0402 what device is being used
IpAddr: 10.1.1.2/0 the IP address of the z/OS end of the connection
If you are using DEVICE and LINK the output will have LnkName: ETH1 instead of IntfName: ETH1.
If you are brave…
you can remove the LINK and DEVICE definitions from the active system and activate the INTERFACE, then at a later date, update the TCP/IP configuration file.
You need to
stop the existing definition
remove the HOST entry for the device
delete the DEVICE and LINK from the running configuration
activate the interface statement
start the interface
Stop the device
V TCPIP,TCPIP,STOP,PORTA
You cannot use V TCPIP,TCPIP,STOP,ETH1 because it says device not found.
Remove the HOME entry for the link
Copy the home statements into a file, remove the entry you do not want, then issue the V…OBEY… on that file. This replaces the active HOME entries.
If you use TSO NETSTAT HOME, the IP address should not be present.
Delete the link and device from the active configuration
One you have removed the HOME statements, and TSO NETSTAT HOME does not show any entries for the device, you can create members DELLINK
DELETE LINK ETH1
and member DELDEV
DELETE DEVICE PORTA
Use the V…OBEY… in turn on each file. You cannot put both commands in one file, as the commands are processed asynchronously and the delete link command may still be executing when the delete device is executed, and then so fail.
The TSO NETSTAT DEVLINKS command should show the link is not in the output.
Activate the interface
Put your interface definition statements into a file and activate it using
V TCPIP,TCPIP,OBEY,USER.Z24C.TCPPARMS(JFACE41)
My definition defines an interface with name JFPORTCP4.
Start the interface
V TCPIP,TCPIP,STA,JFPORTCP4
Test it
TSO NETSTAT HOME should show the IP address, and you should be able to ping it.
You can use TSO NETSTAT DEVLINKS (INTFNAME JFPORTCP4 to display the interface.
Make the change permanent
You will need to:
Comment out/remove the PATH and LINK definitions
Remove/comment out the IP address and link from the HOME statement
Remove the start of the device
Add the interface definition. This could be done using an INCLUDE statement
Add a start of the interface (or add it to the include file).
Use V…OBEY… with the start-up configuration file, or restart TCP/IP
SSH is Secure SHell. It allows you to securely logon to a remote Unix-like shell using OpenSSl.
SSH has little in common with SSL or TSH. For example you cannot keep “certificates” in z/OS keyrings. (The documentation says you can – but it is talking about something else).
SSH uses a different protocol and certificate to TLS – you cannot use TLS certificate for SSH encryption and authentication because they have different formats.
To connect to a server, the server needs to be running a daemon.
I’ve written a blog post on using a client to connect to SSH.
Setting up the SSH Daemon
The SSH daemon runs by default as started task SSHD. I changed the PARM in the JCL to be
//SSHD    PROC
//SSHD    EXEC PGM=BPXBATCH,REGION=0M,TIME=NOLIMIT,
//             PARM='PGM /usr/sbin/sshd -f /etc/ssh/sshd_config '
//*            PARM='PGM /bin/sh -c /etc/ssh/sshd.sh'
//* STDIN AND STDOUT ARE BOTH DEFAULTED TO /dev/null
//STDERR DD PATH='/tmp/sshd.stderr',PATHOPTS=(OWRONLY,OCREAT,OAPPEND),
//         PATHMODE=(SIRWXU)
//STDOUT DD PATH='/tmp/sshd.stdout',PATHOPTS=(OWRONLY,OCREAT,OAPPEND),
//         PATHMODE=(SIRWXU)
The original PARM statement attaches the daemon as SSHD3. With my way, the started task is SSHD.
With the original PARM , the WLM classification came up as Workload SERVERS, SvrClass SRVOMVS, with my change the WLM classification was Workload STARTED, SvrClass STCLOM.
General setup
You can specify attributes that apply to all logons, and use theMatch statement to specify attributes which apply to a subset of logons. For example match on server userid, or match on client IP address.
Start the Daemon
S SSHD
Stop the Daemon
Either cancel SSHD, or cancel SSHD3, depending on how you started it.It may not responsd to the Stop command (P SSHD).
Basic configuration
You can display a logon message using
Banner /S0W1/var/log/banner.txt
You can specify a command that runs when they user logs on.
ForceCommand echo "HI ADCDA"
Listen address and port
You can specify
Port 22
Port 222
ListenAddress host
ListenAddress host:port
JrNoDuAvailable: TCP/IP cannot create a dispatchable unit to process the request. Either TCP/IP is not active or there is insufficient common storage available.
I think the error message means the port is in use, SSHD was unable to connect to the port. Check /S0W1/etc/ssh/ssh_config and find the port. It defaults to 22. Check to see if this is active
SSH is Secure SHell. It allows you to securely logon to a remote Unix-like shell.
SSH has little in common with SSL or TSH. For example you cannot keep “certificates” in z/OS keyrings. (The documentation says you can – but it is talking about something else).
SSH uses a different protocol and certificate to TLS – you cannot use TLS certificate for SSH encryption and authentication because they have different formats.
Basic use
You can issue
ssh colin@10.1.1.2
and this will set up a secure session to the host 10.1.1.2 with the userid colin. By default it will prompt for a password. if you copy a certificate to the server, you can do password-less logons.
The first time you set up a connection you get asked for additional information (along the lines of “are you sure you want to connect to this system“). It stores information so it knows when you reuse the address.
To get out of a remote session command prompt use exit .
Configuring the server
Ive written about configuring the SSH Daemon on z/OS, here.
Different ways of using SSH
Entering the ssh command and the password, may be acceptable in many cases. It many cases, such as within a shell script, you do not want to enter the password. There are several ways of doing this
Enter the password as part of the ssh command. The command and password can be seen in the history file, and over the shoulder, so is not secure.
Store the password in a file, read the file and pass the password to the command. For example use sshpass.
Use keys. You create a key on your client machine, copy the key to userid(s) on the server. When you connect with the key, it checks the userid has the same key; if so it does not need a password.
Use signed certificates. This make administration much easier (well, different). You create a key, and get an SSH Certificate Authority to generate a certificate which includes your public key, the userids it applies to, and other information such as validity dates. The server has just a copy of CA’s public key. When you send your certificate to the server. the CA’s public key is used to validate it, and use it. The server has no additional work to do.
If you use a pass phrase for a key you have the same problem. How do you enter the passphrase when using a script; so do not specify a pass phrase.
You need to ensure that the password file , passphrase, and key are secure – such as only the owner can read it.
You can store command information in ~/.ssh/config. For example
# simple ssh command
Host 10.1.0.3
        HostName 10.1.0.3
        User colin

# ssh command using certificate and keys
Host 10.1.1.2
        HostName 10.1.1.2
        User ibmuser
        IdentitiesOnly yes
        IdentityFile /home/colinpaice/ssl/ssh/colin.key
        CertificateFile /home/colinpaice/ssl/ssh/colin.key-cert.pub

# ssh command for using a key
Host ss
        HostName 10.1.1.2
        User adcda
        IdentitiesOnly yes
        IdentityFile /home/colinpaice/ssl/ssh/colin.selfsigned
If I use
ssh 10.1.0.3 it will use the first definition and user colin
ssh 10.1.1.2 it will logon to userid ibmuser, use the key in the colin.key, and the (signed) certificate in colin.key-cert.pub
ssh ss it will logon with userid adcda using the colin.selfsigned file. Userid adcda on the server needs a copy of the colin.selfsigned file.
Using plain ol’ SSH with a password
You need do no special setup for this.
Using keys
You need to create the keys once, then use them in future.
You can specify different encryption techniques, for example ed25519, dsa, and rsa. It defaults to rsa-sha2-512.
On Linux create the user certificate ssh-keygen -t ed25519
it prompts
Enter file in which to save the key (/home/colin/.ssh/id_ed25519):to save
it also creates ~/.ssh/id_ed25519.pub .
You need to copy the .pub file to the server. You can use
ssh-copy-id ibmuser@10.1.1.2
to copy the public key(s) to the userid (ibmuser). It will prompt for the userid’s password.
To use this file use the command
ssh ibmuser@10.1.12
You can explicitly say which keyfile to use. You can specify -f name on the ssh-keygen, and -i name on the ssh-copy and ssh commands to create and use a file name of your chosing.
I do not know if this is a prioritised list, but the ssh-ed25519 certificate was chosen for the handshake when I had an rsa and ed25519 certificates.
If you want to be able to logon to multiple userids issue the ssh-copy and ssh commands for each userid.
With this you will not need a password to logon to the server. You may have entered the password as part of the ssh-copy-id command, or copied the file to the userid, so it assumes you have access to the userids’ files.
Note: even if you change the password on the server, you can still logon using the key.
To stop someone(ibmuser) using the key – remove it from the /u/ibmuser/.ssh/authorized_keys file on the server. There could be several lines in the file. At the end of each line in the file is client userid@system. For my client it was colinpaice@colinpaice . For example
+ ls -ltr .ssh/authorized_keys
-rw-------   1 COLIN    SYS1        2256 Dec 18 08:21 .ssh/authorized_keys
If the logon without a password fails, use ssh -v colin@10.1.12
On the client, you can list the keys in ~/.ssh/known_hosts2 that a client has for a server using
ssh-keygen -F 10.1.1.2
where 10.1.1.2 is the server name.
Using certificates
When you create a certificate the key is signed by the CA. You can also add information such as validity dates, and add a list of userids this certificate can be used for with no password. I think this is a security exposure, as when you sign the certificate you give a list of userid. This action is out of the control of the z/OS systems programmer.
Even if you change the password on the back end, the logon will work – unless the userid is revoked.
Logically there are three machines involved in this
An isolated machine, which has the CA private certificate. Certificates are sent to this machine for signing and returning.
My client machine – for me this is running Ubuntu Linux.
The server machine – this is z/OS
The steps I took were
On the isolated CA machine create a Certificate Authority. The command ssh-keygen -t ed25519 -f ~/.ssh/user_ca_key -C ‘User Certificate Authority for *.example.com’ created files
/home/colinpaice/.ssh/user_ca_key.pub
/home/colinpaice/.ssh/user_ca_key
On z/OS I created the file /etc/ssh/user_ca_key.pub and copied the user_ca_key.pub file from Linux into it – Using cut and paste.
Make the z/OS file universal read
chmod 644 /etc/ssh/user_ca_key.pub
On z/OS update /etc/ssh/sshd_config and add the following (to point to the file):
TrustedUserCAKeys /etc/ssh/trusted_user_ca_key
On z/OS restart SSHD
C SSHD3
S SSHD
On Linux create the user certificate ssh-keygen -t ed25519 -f colin.key. This creates files
colin.key
colin.key.pub. This contains data like ssh-ed25519 AAAAC3Nz…OeHB colinpaice@colinpaice
Send the .pub file to the CA machine
On the CA machine issue ssh-keygen -s ~/.ssh/user_ca_key -I ‘colin’log -z ‘0002’ -n colin,joe colin.key.pub Where
-I colinlog this is the value which is logged. For example on z/OS, when using the certificate; the SSHD log file had
Sep 10 13:11:40 S0W1 sshd[50397213]: Accepted certificate ID “colinlog” (serial 0) signed by ED25519 CA SHA256:s…TA via /etc/ssh/user_ca_key.pub
-z ‘0002’ you can specify a serial number, or omit this
-n colin,joe a list of userids within the certificate. If you want to logon to z/OS userid userid colin or joe you will not be asked for a password.
This creates colin.key-cert.pub. Send this file back to the requester.
You can store the configuration information in ~/.ssh/config
Host 10.1.1.2
        Hostname 10.1.1.2
        User colin
        IdentitiesOnly yes
        IdentityFile /home/colinpaice/ssl/ssh/colin.key
        CertificateFile /home/colinpaice/ssl/ssh/colin.key-cert.pub
Where
Host is the nickname
Hostname is the address to use
User is the userid to logon to at the remote machine (z/OS)
IdentityFile is the private key for my Linux userid
CertificateFile is the signed certificate sent to the server.
You can then use ssh 10.1.1.2 which will pick up the other parameters from the .ssh/config file.
This will get you into a OMVS session. Use exit to leave.
Another way of doing it.
You can use ssh to copy the key around.
Generate a key if (you do not have one)
Look in ~/.ssh for a file with extension .pub
ssh-keygen -t rsa
Generating public/private rsa key pair.
Enter file in which to save the key (/home/colinpaice/.ssh/id_rsa):
/home/colinpaice/.ssh/id_rsa already exists.
Overwrite (y/n)? y
Enter passphrase (empty for no passphrase):
Enter same passphrase again:
Your identification has been saved in /home/colinpaice/.ssh/id_rsa
Your public key has been saved in /home/colinpaice/.ssh/id_rsa.pub
The key fingerprint is:
SHA256:7S50/Zf8Q7J2VLH71v2WBB2KEVFwyZn21aeI1Tzhk8c colinpaice@colinpaice
You can specify where to put the private and public keys by using -f /u/colin/.ssh/mykey
Copy the key to z/OS
Specify the public key file, and the target userid and destination
The RSEAPI server is the Apache Tomcat server plus RSEAPI specific stuff. If you know how to configure Tomcat, you know most of what you need. The Tomcat customising is documented here.
This post follows on from Getting REST to work into z/OS. I was unclear at first how to correctly specify overrides. I’ve blogged an article Passing parameters to Java program to show how some parameters are specified as RSEAPI_KEYSTORE_FILE=… and other parameters are specified as -Djava.protocol.handler.pkgs=…
See Java Parameters for how I configured RSEAPI to be able to flip configuration options.
Update your level of Java
I had various problems getting TLS to work with RSEAPI.
TLSv1.3 was not supported on the level of Java V8 I originally had.
I had to override the /etc/zexpl/java.security file so that it understood keyrings of the format safkeyring://START1/MQRING
When I refreshed the level of Java (to SR8 FP6 dated June 2023), things worked much better. I would recommend getting a level of Java shipped within the last year.
Without this I got various Java problems, such as an unresolved dependency.
Getting RSE to work with TLS was not trivial
The original version of RSEAPI was v1.0.5 (see /usr/lpp/IBM/rseapi/tomcat.base/bin/current_version.txt) Another version is available in GITHUB with a version of v1.1.0 created 7 July 2022 which I worked with.
TLS configuration changes
RSEAPI supports only one port. To use TLS change the procedure to use SECURE=’true’, (or override it at startup).
The RESAPI proc has the location of the configuration files. Mine says /etc/zexpl.
The main file to edit is /etc/zexpl/rseapi.env . The sample has a lot of commented out statements. I added at the bottom
The …trustStoreType and … trustStore provide the defaults if non are specified in the sserver.xml.
Use of keystore and trust store
The use of a trust store to store the CA certificates, and any self signed certificates is recommended. The keystore then contains just the private keys needed by the server. This means you can have one trust store per LPAR, which saves administratio.
If you use a combined trust key and trust store, and this is shared by applications, then applications may get access to private certificates used by other application, so is not as secure.
The tomcat documentation describes the truststore* parameters. These are in the in <Connector…. within file /usr/lpp/IBM/rseapi/tomcat.base/conf/sserver.xml .
and specify -Dxx where xx is the value in ${xx} such as -DtrustStoreType=”JCERACFKS” . You can hard code the values.
Setup problems
I had a variety of problems. Most were solved by going to a newer level of Java or RSEAPI. For example earlier versions did not support TLSv1.3
Authority issue
I got the message
Caused by: java.lang.IllegalArgumentException: The private key of NEWTECCTEST is not available or no authority to access the private key
This was caused by the certificate belonged to a userid START1, but I was running RSEAPI on userid STCRSE. For userid STCRSE to be able to access the private certificate part of the certificate of another userid’s certificate, the STCRSE userid need UPDATE access to the keyring profile.
My keyring was safkeyring://START1/MQRING. I needed
I found two Remote System Explorer (RSE) servers on my z/OS
RSED (dated on my system 2016)
RSEAPI (dated on my system 2020).
RSED used an internal interface, and is there for backwards compatibility.
RSEAPI is strategic with a REST API. It uses the Apache Tomcat Java web server.
The notes below are how I got RSEAPI to work on z/OS, and run my REST request into z/OS. I was running on z/PDT where the product was installed in HUH100.* libraries, but the system was only partially configured.
There are at least two versions of RSEAPI.
v1.0.5 from 2021 only support Java V8 – and you should use a recent fix pack for Java.
v1.1.0 from 2022 supports Java V8 and Java V11. You should use recent fix packs for these, as earlier ones do not have the latest TLS support.
I found it easier to use a current level of Java.
Basic setup
Mount the file system
The REST server is started with the RSEAPI started task.
The file system was not mounted. Use the TSO command
mount filesystem('HUH100.ZFS') mountpoint('/usr/lpp/IBM/rseapi/')
type(ZFS) mode(read)
You can update your BPXPRMxx to include the same statements.
Start RSEAPI
The set up had mostly been done on my system, I just had to start it.
S RSEAPI,SECURE='false'
SECURE=’false’ says do not use TLS.
This starts several subtasks, including Java. It took over 1 minute for it to accept a connection and over 200 seconds before it was fully up, and able to respond to requests. The time to start is typical of starting a Java Server on my little z/OS running on zPDT on my Linux machine. On real hardware it takes just seconds so I’ve been told.
Once it had started the response time was ok.
Stopping RSEAPI
Within the STDOUT from the RSEAPI was
Registering MVS Console Listener for job RSEAPI6
To stop RSEAPI you have to use “P RSEAPI6”. Once Java had started successfully, it took less than 30 seconds to shut down. If Java was still starting up, it will not shutdown until Java has finished starting, so I tended to cancel the RSEAPI job (cancel RSEAPI6).
Changing the configuration
While exploring RSEAPI, I needed to change the configuration, for example using Java shared classes to improve start up time.
Some configuration is done using RSE specific environment variables in /etc/zexpl/rseapi.env, such as
I built up a big list of variables and added them to the JAVA_OPTS, for example
JAVA_OPTS= “$d1 $d2 $d3 $p1 $p2” .
In the above example d1 is blank, and is not passed to Java. If I reorder the two d1 statements I can easily change the configuration, and later change it back again.
Reading the error logs
I had various problems getting TLS working. One hiccup was that Java writes error messages to //STDERR – in ASCII! and so is not easily read. I changed this to
which lists the contents of the directory, then used E to edit stderr – it displays EBCDIC text, or EA to display the file in ASCII – for the Java stuff.
The TLS support writes messages to the same (/var/zexpl/logs/rseapi_6800.1/) directory. Files have format description.yyyy-mm-dd
The files of interest
catalina.2023-08-07 has information from Java about problems with TLS.
localhost_access.2023-08-07 shows the request and the return code such as “GET /rseapi/api/v1/datasets/COLIN.D%2A/list HTTP/1.1″ 401 437
Enhanced startup messages
By specifying
-Dlog.level=finer
I got useful information in stderr and catalina….log files. For example
Server version name:   Apache Tomcat/10.0.23
Server built:          Jul 14 2022 08:16:11 UTC
Server version number: 10.0.23.0
OS Name:               z/OS
OS Version:            02.04.00
Architecture:          s390x
Java Home:             /Z24C/usr/lpp/java/J8.8_64/J8.0_64
JVM Version:           8.0.8.6 - pmz6480sr8fp6-20230601_01(SR8 FP6)
JVM Vendor:            IBM Corporation
CATALINA_BASE:         /u/ibmuser/aaa/tomcat.base
CATALINA_HOME:         /u/ibmuser/aaa/tomcat.home
...
Command line argument: -Duser.dir=/S0W1/tmp
Command line argument: -Dlog.level=FINER
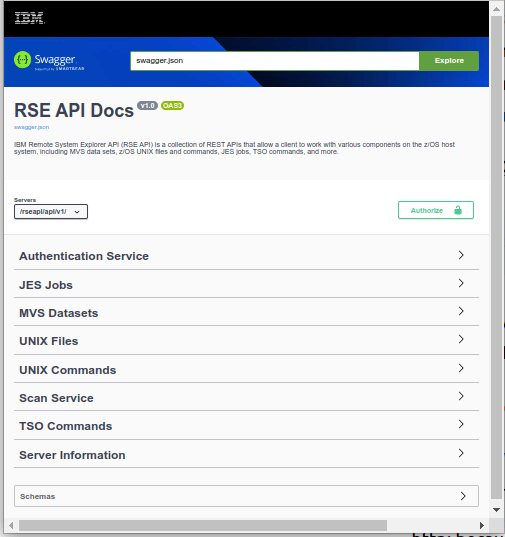
/rseapi/api-docs/ is the URL to display the swagger documentation.
This gave me
Expand the MVS Datasets and it gives a list of option, including
I expanded the GET to get all dataset names matching the filter. I clicked on Try it out. I entered a High Level Qualifier, and selected execute. The first time the session issues a request it prompts for userid and password. It returns with the data about my data sets, and the strings
{"items": [{
  "name": "COLIN.ZLOGON.CLIST",
  "migrated": false
* Connection #5 to host 10.1.1.2 left intact
}]}
This took about 2 seconds to process one file name. It took 7 seconds to process 300 file names.
Processing multiple requests from CURL
There is an overhead setting up the connection. You can issue multiple requests from CURL, so this connection is done once, and is faster than doing multiple CURL requests.
The script ran and created COLIN.LIST and ADCD.LIST.
Using Python to issue a REST request
The Python code below issues two requests.
home = "/home/colinpaice/ssl/ssl2/"
ca=home+"doczosca.pem"
cert=home+"docec384.pem"
key=home+"docec384.key.pem"
cookie=home+"cookie.jar.txt"
# url="https://10.1.1.2:6800/rseapi/api/v1/datasets/COLIN.D%2A/list"

buffer = BytesIO()
c = pycurl.Curl()
dir(c)
print("C=",c)
try:
  c.setopt(c.URL, "https://10.1.1.2:6800/rseapi/api/v1/datasets/COLIN.Z%2A/list")
  c.setopt(c.WRITEDATA, buffer)
  c.setopt(pycurl.CAINFO, ca)
  c.setopt(pycurl.CAPATH, "")
  c.setopt(pycurl.SSLKEY, key)
  c.setopt(pycurl.SSLCERT, cert)
  c.setopt(pycurl.COOKIE,cookie)
  c.setopt(pycurl.COOKIEJAR,cookie)
  c.setopt(pycurl.SSLKEYPASSWD , "password")
  c.setopt(c.HEADERFUNCTION, header_function)
  c.setopt(pycurl.HTTPHEADER, ['Accept: application/json'])
  c.setopt(c.USERPWD, 'colin:xxxxxxxx')
  c.setopt(pycurl.VERBOSE, True)
  c.perform()
  body = buffer.getvalue()
  print(body.decode('iso-8859-1'))
# now a second one
  c.setopt(c.URL, "https://10.1.1.2:6800/rseapi/api/v1/datasets/ADCD.*/list")
  c.perform()
  body = buffer.getvalue()
  print(body.decode('iso-8859-1'))
  print("==================")
  c.close()
except Exception as e:
  print("exception :",e  )
finally:
    print("ok")
This gave the data in JSON format. The c.setopt(pycurl.VERBOSE, True) gave
C= <pycurl.Curl object at 0x55cc87355170>
*   Trying 10.1.1.2:6800...
* Connected to 10.1.1.2 (10.1.1.2) port 6800 (#0)
* found 1 certificates in /home/colinpaice/ssl/ssl2/doczosca.pem
* found 0 certificates in
* GnuTLS ciphers: NORMAL:-ARCFOUR-128:-CTYPE-ALL:+CTYPE-X509:-VERS-SSL3.0
* ALPN, offering h2
* ALPN, offering http/1.1
* SSL connection using TLS1.2 / ECDHE_ECDSA_AES_256_GCM_SHA384
*   server certificate verification OK
*   server certificate status verification SKIPPED
*   common name: 10.1.1.2 (matched)
*   server certificate expiration date OK
*   server certificate activation date OK
*   certificate public key: EC/ECDSA
*   certificate version: #3
*   subject: O=NISTECCTEST,OU=SSS,CN=10.1.1.2
*   start date: Sun, 02 Jul 2023 00:00:00 GMT
*   expire date: Tue, 02 Jul 2024 23:59:59 GMT
*   issuer: O=COLIN,OU=CA,CN=DocZosCA
* ALPN, server did not agree to a protocol
* Server auth using Basic with user 'colin'
Which may be useful when trying to debug TLS problems.